Designing Outdoor Wedding Spaces in Australia: The Role of Landscaping in Creating Memorable Celebrations
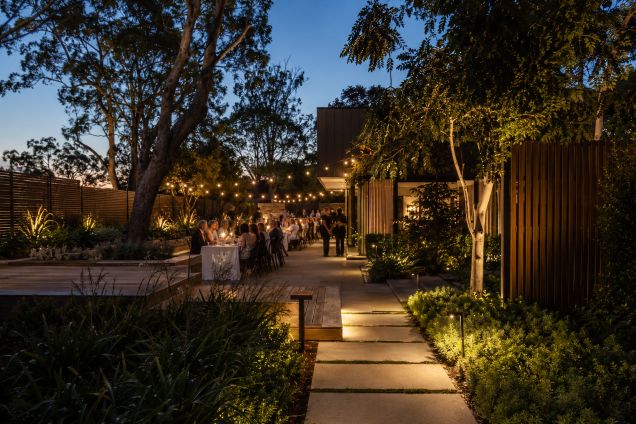
Australia spans eight climate zones, so an outdoor wedding landscape must respond to local heat, rain and planting conditions. Guidance from the Australian Government’s Your Home says landscaping can improve amenity, manage water and moderate conditions around a home. The challenge is turning an attractive garden into a comfortable, navigable and coherent venue.
The solution begins before flowers or table settings are chosen. Treat the garden as a sequence of guest experiences, then improve each part for function and atmosphere. Residential landscape contractors such as Master Groups Sydney illustrate the outdoor services that may contribute to an event-ready property. Any provider should be assessed against the site, budget, council rules and the home’s long-term use.
Step 1: Read the Site Before Drawing the Layout
Walk through the property at the ceremony time. Record sun, shade, wind, slopes, drainage, neighbouring views and existing trees. The Australian Government’s site-planning guidance recommends using landscaping to manage heavy rainfall and choosing plants suited to dry periods. This reveals where guests can gather comfortably and where work is needed.
Estimate the space needed for seating, dining, service staff and entertainment. Keep the ceremony focal point away from household clutter. Place dining on stable, level ground, with separation between speakers and conversation areas. A scaled sketch prevents furniture, catering stations and paths from competing for space.
Step 2: Build a Clear Guest Journey
Plan the route from arrival to ceremony, dinner and departure. Paths should be continuous, firm and recognisable after dark. Avoid loose surfaces where formal shoes, mobility aids or prams may struggle. The Australian Network on Disability advises event planners to consider accessible entrances, routes, toilets, seating and emergency procedures. Ask guests about access needs early rather than relying on assumptions.
Use planting, low edging or discreet signs to guide movement. Separate service routes where possible, allowing caterers to avoid the ceremony aisle. Check that gates accommodate deliveries and emergency access remains clear.
Step 3: Create Privacy Without Closing the Space
Privacy is usually best handled in layers. Existing trees can form the upper canopy, hedges or screens can block direct sightlines, and pots can soften temporary structures. Before adding dense planting, consider airflow and fire risk. Your Home recommends retaining established vegetation where suitable, while using gaps and less flammable landscape elements in bushfire-prone areas.
Screen bins, vehicles, utility areas and neighbouring windows first. Preserve appealing views so the setting feels generous. Temporary panels or movable planters can solve one-day privacy problems without permanently darkening the garden.
Step 4: Plan Lighting for Safety and Mood
Begin with essential illumination at steps, path changes, gates, toilets and service areas. Add softer layers around tables, trees and the dance area only after those needs are covered. Lighting should be shielded and aimed downward where practical. The Australian Government’s National Light Pollution Guidelines for Wildlife recommend limiting unnecessary light, intensity and operating time to reduce impacts on wildlife.
Test the scheme at night. Look for glare, shadows beside steps and dark gaps between zones. Secure cables and use outdoor-suitable equipment. A qualified electrician should handle permanent installations and regulated electrical work.
Step 5: Choose Seasonal, Site-Suitable Planting
Select plants for the local climate, soil, available sunlight and wedding date. The Australian National Botanic Gardens notes that plant survival depends on factors including heat, soil moisture and humidity. Confirm flowering periods with a local nursery, but design with foliage, texture and form as well, since flowering dates can shift with weather.
Use seasonal colour near the ceremony backdrop, entrance and dining area, where it has the greatest effect. Keep strongly scented plants away from food. Indigenous species can support habitat and generally need less water than many exotic choices, as Your Home explains.
Step 6: Design With Photography in Mind
Identify several photo locations rather than relying on one feature. Look for open shade, uncluttered backgrounds, depth and a sheltered alternative if weather changes. Ask the photographer to visit at the planned ceremony time because the position and contrast of sunlight will affect portraits. Protect garden beds by agreeing on routes before guests arrive.
A strong backdrop need not be elaborate. A shaped tree, layered planting or foliage-framed view can support the intimacy of garden weddings while giving photographs a sense of place. Remove hoses, tools and damaged pots, then test planned angles to catch distractions.
Step 7: Prepare for Weather and Recovery
Build a wet-weather option into the layout from the start. The Bureau of Meteorology explains that seasonal rainfall information supports longer-term planning, while weather forecasts guide the week ahead. Use both, then set a clear decision time for moving the ceremony or installing cover.
Finally, plan for recovery. Protect lawns from prolonged loads, provide bins and arrange prompt equipment removal. A successful outdoor wedding space solves practical problems quietly. When circulation, privacy, light, planting and weather planning work together, guests can focus on the celebration, and the landscape remains useful afterward.