Wedding
Planning Elegant Outdoor Wedding Venues with Modern Architectural Features
Outdoor wedding venues must balance visual character with practical requirements such as safe access, weather protection and crowd movement. For venue owners, planners and couples, the challenge is to create a memorable setting without allowing decorative choices to interfere with guest comfort or safety.
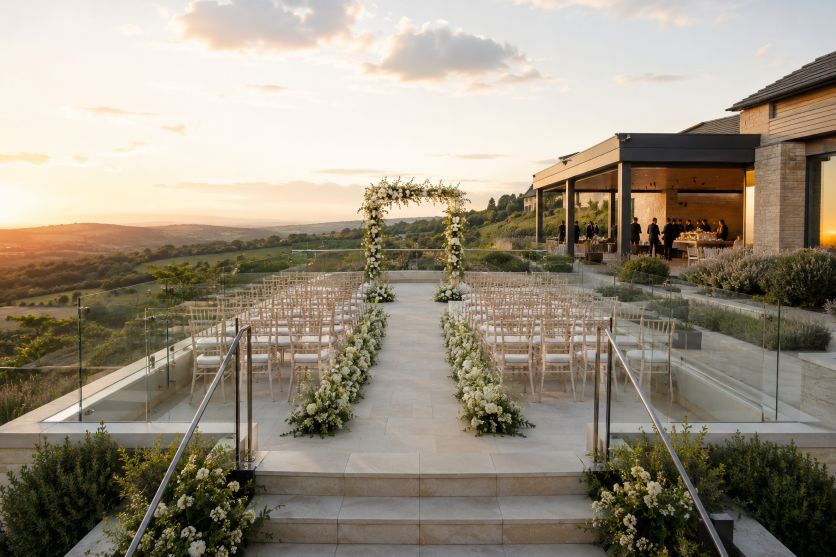
Elevated terraces, balconies and rooftop spaces can provide impressive ceremony backdrops, but exposed edges require careful treatment. Understanding glass balustrade building regs early in the design process helps project teams coordinate appearance, structural performance and legal compliance before construction begins.
Step 1: Define the Venue’s Visual Direction
Start by identifying the atmosphere the venue should create. A country estate may combine stone paving and natural planting with contemporary glazed features, while an urban rooftop might favour clean lines, pale flooring and discreet metal details. A limited material palette usually creates a more coherent setting for ceremonies, photographs and receptions.
Consider how the space will look throughout the day. Glass guarding can preserve views across gardens, water or surrounding countryside, while transparent panels allow daylight to reach adjoining areas. Lighting should support the architecture after sunset without producing glare on glazing or leaving stairs and level changes difficult to see.
Step 2: Plan the Guest Journey
Map the route from arrival to departure before deciding where decorative structures will stand. Guests may need to move between parking areas, ceremony seating, dining spaces, toilets and dance areas. Suppliers also require separate access for deliveries, catering equipment and waste removal.
The Health and Safety Executive advises event organisers to consider ground conditions, site topography and the load-bearing capacity of areas supporting temporary structures. This is particularly relevant when installing marquees, stages, raised seating or substantial floral displays.
Accessible movement should form part of the original layout. Building laws in England in reference to Access to and use of buildings: Approved Document M provides guidance for meeting access requirements in England, including reasonable provision for people to enter and use buildings and their facilities. Step-free routes, suitable surfaces and clearly identified accessible toilets can make the celebration more comfortable for a wider range of guests.
Step 3: Address Elevated Areas Carefully
Terraces and balconies attract guests because they offer views and natural gathering points. They can also become crowded during drinks receptions and photographs. Furniture, planters and portable heaters should therefore be arranged so they do not narrow circulation routes or encourage people to climb near an exposed edge.
Building laws in England in reference to Protection from falling, collision and impact: Approved Document K covers protection from falling, collision and impact in and around buildings in England. Its guidance addresses stairs, ramps, guarding and barriers. The correct solution depends on factors such as the location, intended use, fall height, loading and surrounding construction, so a qualified designer should assess each project individually.
A compliant balustrade is more than a row of attractive glass panels. The glass specification, posts, channels, handrails, fixings and supporting substrate work together as a system. Structural calculations and installation details should reflect the expected use of the venue, including the possibility of groups gathering beside the barrier.
Step 4: Integrate Crowd and Emergency Planning
Elegant layouts still need clear escape routes and sensible capacity limits. Thoughtfully positioned digital signage in modern wedding venues can guide guests towards reception areas, toilets and other facilities while complementing the event design. Ceremony chairs, photo booths, service stations, display screens and decorative arches must remain clear of exits and essential circulation routes.
Guidance from the Health and Safety Executive explains that event barriers can guide crowds, reduce overcrowding and separate people from hazards. Permanent architectural guarding and temporary crowd-control barriers perform different jobs, so one should not be treated automatically as a substitute for the other.
Step 5: Prepare for Changing Weather
Outdoor design should include a realistic wet-weather plan. Covered areas, slip-resistant routes, secure furniture and sheltered waiting points allow the venue to respond without disrupting the entire event. Drainage also deserves attention around terraces, steps and entrances where standing water could create difficulties.
The Met Office issues warnings for conditions including wind, rain, thunderstorms, lightning, fog and extreme heat. Venue teams should monitor forecasts, establish decision points and document when exposed spaces, temporary structures or loose decorations will be closed or removed.
Step 6: Confirm Compliance Before Opening
Bring the architect, structural engineer, building-control professional, installer and event operator into the process before final specifications are approved. Requirements vary across UK jurisdictions, and planning permission, listed-building consent or other approvals may apply alongside building standards.
Request calculations, product specifications, installation records and inspection information for the completed guarding system. Regular checks should then look for loose fixings, damaged panels, corrosion or changes to adjacent flooring. Records make it easier to address defects before guests enter the space.
Creating a Venue That Lasts
A successful outdoor wedding venue feels effortless because its practical details have been resolved quietly. When views, accessible routes, weather planning and protective barriers are considered together, modern architecture can support the celebration rather than compete with it. Early professional input gives owners greater freedom to build an elegant setting that remains functional as events and expectations evolve.